Skip to Content

Blog Archives

5 Ways to Get More Volume in Your Hair

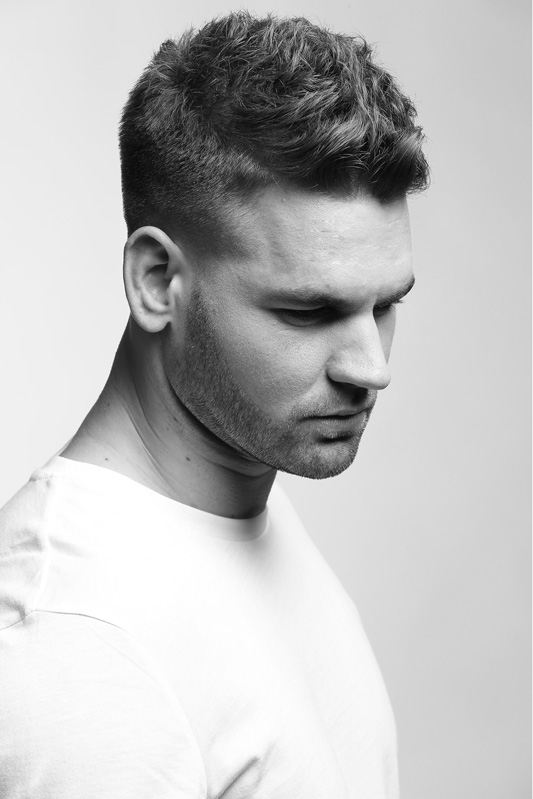
Flat hair can be a real burden and generally a frustration. There are a variety of reasons why your hair might look flat, from having naturally thin hair to having heavy hair that weighs your hair down on top, but there are solutions to the problem.

Hair with a little volume is typically more flattering. To achieve volume in your hair, try these five methods…

1. Blow Dry Upside Down

One of the easiest ways to get more volume into your hair is to blow dry it upside down. In drying your hair the right way up, typically you concentrate the heat down the shaft of the hair, making it sit flat to your head. Instead, if you blow-dry it upside down, you will be lifting your roots away from your scalp to create instant volume. This is ideal for rough drying, but you can spend the last couple of minutes drying your hair the right way up to achieve your desired style.

2. Switch your Parting up

Your hair will naturally start to sit flatter at the roots as the day goes on as it settles into your style. In addition, if you wear your parting in the same place most days, essentially you are training it to sit this way and it will naturally sit flatter on your parting. To instantly create more volume, switch up your parting on those pesky flat hair days.

3. Use Volume Boosting Products

Sometimes our hair needs an extra helping hand. From nourishing and smoothing conditioners, to texture creating balms, we use other products daily to help control our style, so why not consider introducing a volume-boosting product too? We love the Pure Abundance Hair Potion by Aveda, which can be applied to damp or dry hair to add impressive volume and texture.

4. Sleep in a Bun

This method might sound unusual, but it’s actually really effective. To wake up to amazing volume, try popping your hair up in a bun after washing it in the evening. Do this while your hair is still damp, and go for a high and loose bun. Use a scrunchy or similar to hold in place to avoid getting hairband lines in your hair. By doing this, your hair will dry in a position so that it’s lifted off your scalp, so when you take it down, your roots will stand up a little to create impressive volume.

5. Use Dry Shampoo

While some dry shampoos aren’t great for your hair, using one with natural ingredients and of premium quality is a great way to boost your roots. If you don’t wash your hair every day, dry shampoo will help remove any excess oil that can weigh it down and give your hair a much-needed lift. Try the Shampure Dry Shampoo by Aveda to revive your hair using 99.8% naturally derived ingredients. For more assistance learning how to boost your hair to add impressive volume, get in touch and book an appointment. We’d be happy to help you find a style that will ensure you have voluminous hair each and every day.

0 0 Continue Reading →

Fringes by Face Shape: Which Style Will Suit you Best

Let’s face it, we’ve all had a fringe disaster at some point, most likely during our experimental teenage years. Fringes can completely transform your look, but because many of us are unclear on what kind of fringe would suit us best, we generally tend to avoid them, for fear of making a mistake.

Fringes can be super stylish, and provide a great way to update your look without altering the length of your hair, which is why we’re helping you work out which fringe might suit you, in accordance to your face shape…

Square Face Shape

Long eye-grazing fringes that are a little tapered on the sides will help soften square face shapes. Go for a fringe that sits just below your brows, sitting heavier at the sides so that your hair doesn’t get in your eyes. To the centre the hair should be a little feathery – no blunt lines here – this style should be soft.

Round Face Shape

A gently arching fringe is the best option for a round face, which compliments soft and rounded features. A blunt fringe might make a round face appear even rounder, so avoid any harsh lines. A curved shape is the right way to go, with thickness to the fringe, rather than a soft wispy finish.

Heart Shaped Face

Generally, if your face is heart shaped, it might be a little top heavy. A side fringe is the perfect way to add balance to your face. Opt for a feathered fringe where the shortest pieces meet the arch of your eyebrows, and the longest sit at the outer corner of your eyes.

Oval Face Shape

If you’ve got an oval face you can celebrate – nearly every fringe style will suit you, so you have a little more room to experiment. One of the most flattering styles for you is a light and textured straight fringe. Go for a length that sits just between the brow and eyelashes, and is a little longer on the sides. This will give you options to either wear your fringe straight and parted in the middle, or sweep it to the side. Fringes are well worth experimenting with, but avoid making a mistake by establishing what your face shape is, and what will suit you first, as they can take some time to grow out.

0 0 Continue Reading →

How to Create Natural Waves

Naturally looking wavy hair is one of the most sought after looks around the world. Waves seem to always be on trend, and it’s this relaxed ‘I woke up like this’ vibe that we all want to achieve. Waves look soft, pretty and feminine, without being over done or too styled. Wavy locks are a go to for many occasions – from festivals and summer holidays, to bridal looks and everyday style – waves continue to be in high demand.

Night Time Buns

No time in the morning to style your hair? Try this simple way to create natural waves, without the addition of heat damage. Just before bed, part your hair and split into two sections. Twist each section into a tight bun and secure with grips. Use a spray bottle to spritz each bun to make the hair damp. Leave in over night to create natural looking waves. In the morning simply unravel each side. You might need to tease the hair into place here and there, and back brush a little to create volume, but you’ll only need five minutes in the morning and you’ll be good to go.

Mermaid Worthy Waves

Creating waves with your straighteners is easier than you might think. Our tool of choice is the GHD IV Styler Hair Straightener, as it’s the perfect size to create mermaid style waves. In addition, who doesn’t love having a tool that you can create multiple looks with?

To create waves with your straighteners, section off the top three quarters of your hair and secure with a band so that it’s out of the way. With the hair that’s left down, take a section at a time around one inch wide and place your straighteners at the top. Move them down the length of the hair curling in and out, in and out as you go. You can make your waves as tight or as lose as you want. Work your way around all of the hair that is down, then take down another quarter section of your hair and continue until you’ve done it all.

Back brush the roots a little to avoid the hair being flat at the roots, spritz with hairspray and you’re done.

Whether you want to create quick and easy waves without heat, or you want to go for a more precise look, creating waves at home is doable with these two methods.

0 0 Continue Reading →

Top 3 Beach Worthy Hairstyles

Beach hair can feel tricky to approach. You want to look and feel great on the beach this summer, but you don’t want to spend a lot of time styling your hair. In addition, you want to protect your hair from the salty sea water and the sun. The trick is finding the right balance – creating a style that you love but that is practical and speedy to achieve. Read on to discover our top three beach worthy hairstyles, for your summer break in 2018…

  1. Half Up Braids

Keep your hair out of your face and off your forehead with this half up-do. The whimsical festival feel makes it perfect for a day at the beach. Simply section off the hair, taking two 2-inch wide sections at the front of the head. Begin to plait backwards, picking up a little more hair as you go to create french braids. Do this on either side, and secure at the back of the head with grips. Ready to go for a swim? Simply pop your hair that’s left down into a bun to protect your hair from the salt water.

  1. Half up Bun

This is another great style that will keep your hair off your face in the hot weather, as well as looking stylish. Split your hair into two, picking up the top half and leaving the underneath down. It’s best to section your hair off from the top of your ears, creating a line from your ears to the back of the top of your head, in an upwards motion. Use a comb to brush the top half of your hair back so that it’s neat, then twist into a bun at the top of the back of your head. Secure with grips and tease a few strands out to create a chilled out beach vibe.

  1. Side Swoop Braid

Keep your hair off the back of your neck and off one side too, with this beach-worthy braid style. This is ideal if you want to keep your hair neat, but don’t want to go for a full up do such as a ponytail or a bun. It’s also ideal if you’re going out in the evening and want to create beachy waves the natural way. Simply leave your braid in all day and sprizt until damp, leave to dry in the sun and take out in the evening for natural waves.

To style start by parting the hair on one side. At the front of your head, take a section about two inches wide and start to braid the side that has the most hair on. Sweep the hair from the other side and the back of the head round the back and onto the side you are braiding. As you go, start to add in more sections of hair from the back. This doesn’t have to be neat and precise, this is all about creating a laid back look. As you reach the length of your hair, you should now have all of your hair in the braid. Secure with a band, then take a section of hair and wrap round the band to conceal.

Beach-worthy hair doesn’t have to be a headache. Create stylish hair that’s practical too, with these three styles.

0 0 Continue Reading →

Easy Summer Holiday Hair Styles

You’ve been looking forward to your summer holiday all through the winter. That chance to escape, relax and get some sun on your skin is exactly what you need. You want to look and feel great on your holiday, but you want to enjoy yourself, and worrying about your hair is the last thing that you need. Instead opt for flattering, stylish and chic hair styles, that are easy and quick to do, so that you can make the most of your summer escape…


The Low Pony


This is an ideal summer holiday style – low maintenance, easy to create and always stylish – the low pony is your go-to this summer. Think chic, smooth and simple. To create the look wash your hair in advance with a smoothing shampoo and conditioner. Part the hair in the middle and smooth back towards the base of your neck. Secure in a low pony with a band, then wrap a piece of hair around the band to hide. Finish of with a spritz of hairspray to smooth down any fly aways. This is the ideal style for humid and hot weather, as it’ll stay looking smooth all day.

The Falling Down Up-Do

This look is so easy to create as it requires little in the way of precision. It’s an undone up-do that allows you to get your hair up off of your neck for hot weather, but that still looks soft and pretty. Scoop your hair back into a simple chignon, placed just above the neck to help keep you cool. Then coax out a few strands around your face and ears to soften. Curl the strands if needed to create a pretty and natural finish.

The Double Bun

This playful look is ideal for a day on the beach – it keeps your hair neat, out of the way, and can even result in beachy curls if your hair gets wet and dries in the sun. Start by parting the hair in the middle and split the hair into low bunches. Secure with bands at the nape of the neck. Start on one side, twisting the hair until it starts to wrap up, wrap into a neat bun and secure with grips. Repeat on the other side.

Whether you’re jetting off on a beach holiday, to a festival or for a family adventure in the sun, try these easy hairstyles to help keep you cool, but looking stylish all day long.

0 0 Continue Reading →

Top 3 Styling Tools for Curls

For a long time GHD have dominated the professional haircare and styling market. 2018 is no different, and for good reason – with advanced technology, high quality products and impressive results, GHD continue to be a hair styling brand that you can rely on.

Most well know for its straighteners, GHD also offer a great range when it comes to creating curls. Whether you want to achieve natural looking waves, big and bouncy curls or even corkscrew curls, GHD has you covered. Read on to discover out top three styling tools for creating curls…

  1. GHD Curve Soft Curl Tong: £120.00

As part of the latest range of tongs and wands from GHD, the Curve Soft Curl Tong uses the tri-zone technology for healthier looking curls that will stay in place all day. With a large barrel, it’s easy to create natural looking bouncy curls.

Set as a temperature of 185C, the tongs ensure a long lasting curl without damaging your hair. Easy to use and effective, you won’t find a better natural looking bouncy curl with any other styler.

  1. GHD IV Styler Hair Straightener: £86

With a little bit of practice, you can actually curl your hair any way you want with the IV Styler Hair Straightener. This is the ideal tool if you like to style your hair differently, from poker straight and wavy, to bouncy curls and tight curls.

The multi-action, refined ceramic blades work efficiently through the hair for a professional finish. The plates glide smoothly over the hair, meaning no snagging or pulling, no matter what style you are creating. If you’re not sure how to use your straighteners to create waves or curls, check out YouTube tutorials to master this skill. Once you’ve got the knack it’s really quite easy.

  1. GHD Curve Classic Wave Wand: £120.00

Create beach-worthy waves with the Curve Classic Wave Wand by GHD. The tri-zone technology ensures that the hair will stay in place day and night, without damaging the hair during styling, for healthier looking waves.

Traditionally, achieving the perfect beach wave can be tricky, but this styling tool makes it super easy. The 38-26mm oval shaped barrel creates shapely and deep waves and is perfect for use on mid to long hair.

Whether you’re looking to create waves, curls, poker straight hair or a bouncy blow dry finish, GHD provide all of the tools you need to create your ultimate look. In addition they are renowned for their quality, which makes your investment translate into amazing looking hair for years to come.

0 0 Continue Reading →

5 Celebrity Styles to Try this Summer

One of the easiest places to find inspiration for a new summer style is through social media and celebrity culture. Today the celebrity isn’t just the actor, model or singer, it’s the blogger, influencer and icon too.

If you’re looking for a little hairstyle and colour inspo, here are five celebrity styles to try this summer…

Margot Robbie

Margot Robbie’s blunt and angular cut has inspired a trend this season. Just long enough to be styled up as well as down, Margot has gone for blunt ends with the hair swept across from one side leaving the hair thick and blunt to one side. Try Margot’s style and go for ice blonde locks with darker roots, a deep part and blunt ends.

Emma Watson

Draw inspiration from Emma Watson’s latest cut and opt for a mico-fringe this season. If you’re partial to a fringe, this is the perfect update for the hot weather. Think a short version of a fringe, parted a little so that it doesn’t sit straight or look blunt. Blunt ends are not what you’re trying to achieve with this look.

Kerry Washington

Try a soft and natural looking bob for Spring/Summer in the style of Kerry Washington. Think of a grown out bob, with a side part in natural looking waves. Go for a blunt cut and then add texture with waves and textureising spray.

Rita Ora

Well know for her playful sense of style, channel your inner Rita this season and experiment with pastel colours. From pastel dip dye and ombre, to a full head in a single pastel shade, pastels provide the perfect colour update for this season. Traditionally used by blondes, brunettes have been seen with pastel ombre updates. If you’ve always wanted to experiment with colour in your hair, now is the perfect time.

Olivia Munn

If a subtle colour update is more of your thing, consider ribbon highlights in the style of Olivia Munn. This is a sun kissed effect that can be used to add warmth to darker shades, or create a sun kissed look in mid to dark blondes. The colour is painted on in the mid to long length, mostly on the underside of the hair, with a few subtle highlights on the tips of your layers.

Which celebrities do you feel inspired by? With so many new styles emerging every week, its’s tricky to pick just one to try!

0 0 Continue Reading →

5 Bridal Hairstyles for 2018

Whether your on the hunt for the perfect hairstyle for your big day, or you’re looking for a style that will suit all of your bridesmaids, 2018 had provided some stunning new bridal hair trends.

Read on to discover five bridal hairstyles for 2018…

  1. Textured Low Updo

This is a 21st century update on the bridal updo. It’s unfussy, pretty and feminine, and will stay in place all day.  Think of a stylish combination of loose french braids and a simple chignon. At the front and the roots create soft and pretty volume, and soften the style by teasing a few strands of hair our around the face. Leave the look simple, or finish it with a vintage jeweled slide.

  1. The Undone Bun

The bun is still one of the most popular bridal styles, but it also works brilliant for bridesmaids too. Think soft and feminine, rather than neat and tight. Try a chignon at the base of the neck. The hair should be swept back from the forehead and twisted to create volume. This is the perfect whimsical updo – just finish by teasing a few pieces of hair out around the face and out of the chignon for a soft finish.

  1. Plaited Waves

When you have long hair, you want to show off your locks. Consider wearing your hair down for your big day, adding a fairytale finish with tiny braids. To create the look, part the hair in the middle and wear wavy and soft. Add a few small but lose plaits through out the hair. Try adding a few under the bulk or your hair, and a few on top to. This look shouldn’t look too styled or uniform.

  1. The Low Pony

This look is perfect for brides who prefer a sleeker but low maintenance look. Leave the length of the hair soft and a little fluffy, rather than smoothing it down. This can be achieved by adding soft waves to the hair. Sweep the hair back at the crown and keep the hair on the head smooth. Secure into a ponytail at the base of the neck, and wrap a strand of hair around to hide where you are secured the ponytail for a natural finish.

  1. The New Half Updo

Rather than opting to put up all of the top half of the hair, consider this softer approach. Take the hair on one side, starting about an inch back from the face. Split into two sections, leaving the bottom half of the hair free. Then twist or plait the upper section towards the back of the head, securing in the centre of the back of the head with pins. Wear the hair wavy and natural, and ensure the hair at the back covers the pins so that the braid naturally merges with the rest of the hair.

This year it’s all about romantic, soft and feminine bridal hair. Try a whimsical style, or opt for a sleeker version to suit your own unique style.

0 0 Continue Reading →

Beard Grooming Tips: Styling and Maintenance

If you’ve done little in the way of beard grooming you might not be aware of what a difference a little extra styling and maintenance can make. Just a handful of tools and products are often all you need to create a stylish beard look. With so many different styles of beard to choose from, just spending a little time here and then can ensure that yours looks neat and styled, instead of unruly and out of control…


Know how and when to trim

When it comes to styling your beard, it’s important to know what you’re doing, to avoid any styling mishaps. If you plan to style it yourself at home invest in a good quality trimmer – something that allows precision is ideal. It’s important to trim regularly to keep the shape of your beard, even if you are trying to grow it. If beard trimming is new to you, or you want to improve your skills, why not book in for a trim with your barber and get a few tips.

Wash it

Keeping a clean beard is particularly important during the early stages of growth, due to trapped crumbs and skin cells irritating the skin and causing itchiness. To ensure your skin stays healthy underneath your beard scrub it a couple of times a week with a specialised beard wash. It’s easiest to do this as part of your routine when you are in the shower. Wash your beard last and gently pat it dry to avoid creating frizz and split ends.

Train your beard

It’s unlikely that your beard will automatically grow into your desired shape, and to create this you will need to regularly trim and groom your beard. A daily comb with a beard comb or brush will loosen stubborn hairs and encourage them to grow downwards, rather than across.

Learn to love beard oil

Nothing keeps on top of beard maintenance better than beard oil. Designed to smooth, soften and condition the hair, beard oil also adds a fresh scent so that you can be sure your beard smells great in between washing. A beard oil will be particularly good if your beard is wiry and unruly.

Style it

Despite all of your efforts to keep it clean and growing in the right direction, your beard will still need a little daily polishing. The good news is this doesn’t take more than a few minutes, and will ensure that you look fresh and neat every day. Smooth and shape your beard and mustache into place using a little beard wax to keep your beard stylish and smooth.

0 0 Continue Reading →

The Hairbrush Guide 101: Everything you Need to Know

Selecting the right hairbrush for you may not seem like a big deal, or something that requires too much thought, but the truth is selecting the right hairbrush for your hair is key to the health of your hair. There are many options available on the market, and in some cases it is necessary to own more than one hairbrush, but how to you know which style is right for you and when each brush can be used?

Read on to discover the full guide to hairbrushes, so that you can make the right decision for you…

The Oval Cushion

This is an everyday brush that many of us already own, but it’s possible you could be using your brush wrong. The oval cushion is ideal for detangling dry hair, teasing and adding shine, but shouldn’t be used on wet hair as the bristles often aren’t strong enough and can snag at wet hair. If you have fine to medium hair and you don’t mind having to buy a different brush for your hair when it is wet, the oval brush is a great option.

The Round Wooden

This round barreled brush is perfect for styling and blowdrying, but not idea for everyday brushing. If you regularly blow dry your hair and style as you go then this brush is a must to help you add shape and body.

The Round Ceramic

If you’re a slave to the straighteners then this brush is an essential as it can help you smooth, detangle and guide the hair as you style. This brush to to be avoided by those who have fragile or very fine hair as it can snag on thiner hair types.

The Flat Paddle

This is probably one of the most popular brushes, and it is a great all rounder. It’s best for detangling wet hair, but can be used on dry hair too. Try to avoid styles that have ball tips as these will often fall off quickly once you start using the brush. Instead invest in a more expensive brand with sturdy bristles. This brush is also particularly good for thick hair.

The Half Round

Perfect for shorter styles, this brush is ideal for drying fringes and sleek bobs, to follow the curve of the head and shape at the ends. This brush isn’t great for styling long hair though, but can be used to brush long or short hair for general everyday brushing.

Whether you buy one brush or you have several, it is worth investing in a good brand as your brush will be something that you use on a daily basis.

0 0 Continue Reading →